Photo by Amber Helsel
Wednesday, May 15, 2019
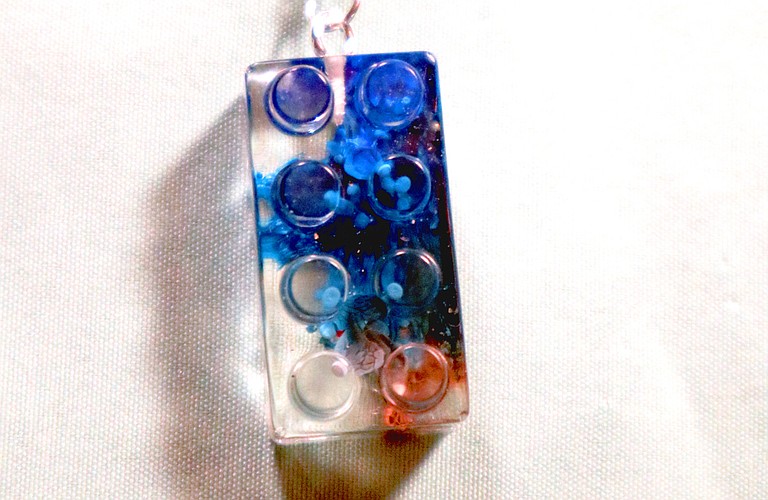
Resin might be a tricky medium to master, but once you figure out how to do it, you can use it to make so many things. While I have created many shapes with resin, one of my personal favorites has been LEGO necklaces.
Here is how I did it. For items such as the mold and jewelry findings, you can find them at a crafts store or online. Keep in mind that this method can apply to any silicone or resin mold, but I chose LEGOs.
Pendant
Epoxy resin (Art Resin or Art n Glow are good choices)
LEGO brick silicone mold
Alcohol ink
Plastic cup or measuring cup you don't care about
Digital scale (optional)
Gloves
Jumbo craft sticks or silicone spatula
Creme brulee torch (optional)
Necklace
Rotary tool or electric drill
1/32-inch bit
Mini jewelry eye-screw pins
Jewelry chain (which type you pick is up to you, but I always choose a cable chain)
Jump rings (this is also up to you, but I suggest 10mm ones)
Lobster clasp
Needle-nose and flat-nose pliers, and wire cutters for jewelry
Ruler or measuring tape
Directions
Pendant
Put on your gloves (important), and then measure out your resin and your hardener in your measuring or plastic cup with a ratio of one to one. While eyeballing has worked fine for me in the past, I've found that a digital scale makes it more precise. For that method, you can measure out the resin and hardener in the same cup, but keep an eye on the ounces of each. A little bit of math is involved in this step. If you measure them out by eye, do it in two separate cups and then pour the hardener on top of the resin. Just make sure you eyeball extremely carefully, and get as much of the hardener out as you possibly can.
Once you've combined the resin and hardener, mix slowly with the craft stick or spatula for three to five minutes until the mixture is fairly clear.
Pour the resin into the mold and then use the torch to get out the bubbles. Only do this for a few seconds at a time, though.
At this point, add the alcohol ink. You have a 30- to 45-minute window for this step. Check your resin for work time, also known as pot life.
Cover the mold with a cardboard box or something similar, and let it sit for 24 to 48 hours. My suggestion is 48 just to make sure it's completely cured.
Necklace
Drill into whatever side you want to put the eye screw in.
Add the eye screw, spinning it until it's tight enough that it won't come out accidentally. The needle nose or flat pliers can help with this step.
Put the jump ring onto the eye screw, making sure to close it tightly. Using both needle-nose and flat-nose pliers (one for each side) also make this step much easier.
Measure out your chain and then cut it with the wire cutters. The general rule is to figure out how long you want the necklace and double those inches.
Pull the chain through the jump ring.
Put jump rings on either end of the chain. Close one and leave the other open. Add the lobster clasp to the open jump ring, and then close the ring.
Comments
Use the comment form below to begin a discussion about this content.
Sign in to comment
Or login with:
OpenID