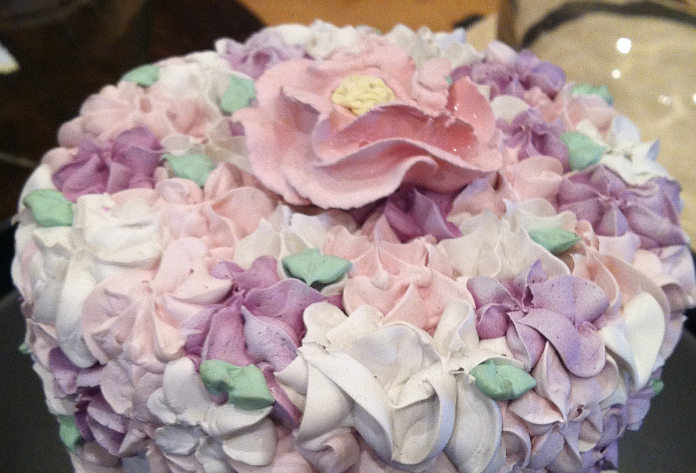
Baking and decorating a homemade cake can be a touching wedding gift. Jane Flood
Wednesday, January 9, 2013
One of the most interesting and informative cooking classes I have ever taken was in Atlanta from a pastry chef who was on the Food Network’s “Cupcake Wars.” She taught me how to use inexpensive and easy tricks for decorating cakes and, though this skill is valuable any time of the year, being able to make your own cake for a bridesmaids’ party, reception, or wedding helps to cut costs and is a lovely gesture.
While a multitude of items are available for cake decoration, for minimal investment, head to a local cooking or craft store for the following items:
• A turntable designed to hold a cake.
• Cardboard rounds designed for holding and moving the cake from turntable to serving plate or moving boxes.
• Frosting bags (you can also use plastic freezer bags with the corner snipped off).
• Icing tips of various shapes.
• Styrofoam forms shaped like a cake, for practice decorating.
• Several offset spatulas.
Icing the Cake
It is essential (and fun) to practice before the big day. First, begin with icing the cake. While you may choose to use butter for the actual day, shortening is much easier and economical to work with—and it produces the most professional results. It just “works” better with icing and decorating.
Practice on a Styrofoam form or dense pound cake using spatulas shaped for various angles. Place a dollop of icing on the turntable and then put the cardboard cake board onto the icing to “glue” it so that the cake won’t slide around. (This is also a good tip for transporting layers to another location.)
After placing the cake on the cardboard, dip out a large portion of the icing and place it on the side of the cake. Rotate the turntable with your opposite hand so that the icing spreads evenly. Make sure to have a glass of water nearby. You must dip the spatula into the water, scraping down the sides of the spatula and then drying it before scooping out more icing after every stroke. This sounds tedious, but is an important tip so that crumbs don’t accidentally accumulate into the icing itself.
The topmost layer of the cake should be upside down—the flat side will be the top so that you have the smoothest surface possible. Another tip: Freeze the cake for 10-15 minutes between layers of icing to lock in crumbs.
Decorating
Practice with the icing tips on a piece of cardboard to familiarize yourself with not only each design, but how much pressure to exert when using various tips. When you are comfortable with a certain design, decorate on your practice form.
If you are considering color for details of your frosting, again, experiment. The best type of colored “dye” for frosting is gel dye. Place a toothpick into the gel and add incrementally to your icing until the desired color is achieved.
Buttercream Decorator’s Icing
Take your time making this delectable icing. Go slowly and enjoy the process. Add liquid slowly, as too much added too soon can result in a poor texture.
1 cup (two sticks) salted butter, softened (or you can substitute 2 cups of shortening)
1 teaspoon pure vanilla
1 pound powdered sugar
1 to 3 tablespoons half-and-half or cream (you may use water or milk in a pinch)
In a mixing bowl, cream the butter or shortening with vanilla until smooth. Add sugar gradually, allowing the butter and sugar to cream together before adding more. Scrape down the sides as you go.
The mixture should look a little dry at this point. Start adding the cream one tablespoon at a time, beating on high speed until it blends to the right texture. Be careful not to add too much cream because it is difficult to get the proper texture back.
Hints: For almond frosting, add 1/2-teaspoon almond extract and 2 drops of yellow food coloring. For chocolate icing, add 1/3- to 1/2-cup cocoa (you may also need one or two tablespoons
more cream).
Butter Cake
This is a rich, old-fashioned butter cake, perfect for a wedding cake. If you do choose to use this cake for a wedding, I recommend leaning toward almond flavorings (at least for the frosting). Cupcakes are also very popular right now, and this recipe will make 24. Consider decorative touches of candied flowers or sprinkles, and place your cake or cupcakes on a pedestal cake plate, if possible, which provides height and makes a nice focal point.
6 large egg yolks
1 cup milk
2 and 1/4 teaspoons vanilla extract (or almond extract)
1 and 1/2 cups sugar
3 cups cake flour, sifted
1 tablespoon plus 1 teaspoon baking powder
3/4 teaspoon salt
1 and 1/2 sticks of butter, softened (do not substitute margarine)
Preheat the oven to 350 degrees. Grease and flour two 8- or 9-inch round cake pans.
In a mixing bowl, combine egg yolks, 1/4 cup of milk and vanilla (or almond) extract. Then, in a separate mixing bowl, combine the dry ingredients and mix for 30 seconds on low speed. Add softened butter and remaining milk. Mix on low speed until moist and increase to medium speed for one and a half minutes. Scrape down the sides and begin adding the egg mixture gradually, in small batches, beating after each addition for 15 to 20 seconds.
Pour batter into greased and floured pans until half full each. Smooth the surface with a spatula. Bake for 30 minutes, or until a cake tester comes out clean.
For cupcakes, bake at 350 degrees for about 18 minutes. Keep your eye on them and test with a cleanly removed toothpick in the center to see if they are done.
Let cool completely before frosting and decorating.
Comments
Use the comment form below to begin a discussion about this content.
Sign in to comment
Or login with:
OpenID