Wednesday, October 28, 2009
Both my parents were raised in the suburbs south of Chicago. Growing up, I heard stories from my dad about going to the annual county fair as a child, where he would indulge in one of his favorite treats-a red, juicy apple on a stick covered in a sticky-sweet candy coating.
I also recall long car trips from Mississippi to Illinois every summer to visit my extended family. Because small children are not known for tolerating long road tripsand I was no exception-my parents made sure they had adequate pit stops scheduled along the way to break up the monotony. One such stop included a Mrs. Fields bakery in Tuscola, Ill., where my dad bought half a dozen "gourmet" candy apples dipped in caramel and chocolate and then rolled in chopped nuts. He may have shared one with my mom and me. The rest he usually polished off by himself.
Making your own gourmet candy apples at home is not difficult. However, there are a few tips to keep in mind. Selecting the right apple is key. Braeburn, Fuji, Golden Delicious, Granny Smith, Jonathan, Jonagold, Lady and McIntosh apples have the right amount of firmness to hold up to the dipping process.
Try to purchase apples from a local farmer's market, as apples from the produce section of your grocery store are typically coated in wax, which affects how well your toppings adhere to the outside of your apple. If you do end up purchasing wax-coated apples, dip them in boiling water for a few seconds and wipe with a clean cloth to remove the wax coating. Chill your apples for about an hour in the refrigerator before you begin dipping them.
Just about everyone has had a bad experience with melting chocolate. White chocolate especially can be incredibly fussy. The two biggest faux pas most people make is overheating the chocolate, causing it to become thick and lumpy, or allowing moisture to get into the mixture, causing the chocolate to seize. Once chocolate has seized, it becomes the consistency of wet sand, and there is really nothing left to do but throw it out and start over.
I strongly suggest using a double boiler. That doesn't mean you have to go out and purchase a fancy contraption. In my house, I simply boil a few inches of water in a saucepan and then place a larger bowl on top of the pan. Make sure your bowl is large enough that it doesn't touch the water in the saucepan.
Once your water has begun to boil, either turn off the heat or remove it from the burner before adding your chocolate. This will prevent overheating. Boiling water also has a tendency to splash and produce steam that can accidentally get into your chocolate. By using hot rather than boiling water, this will also prevent seizing. Make sure your bowl, utensils and apples are completely dry as well.
Finally, line a baking sheet with either waxed paper or tin foil sprayed with cooking spray. This will provide a perfect surface to allow the apples to cool while preventing them from sticking.
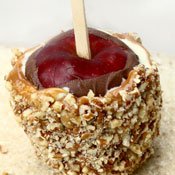
Triple-Dipped Candy Apples
6 apples 6 popsicle sticks or wooden dowels
1 bag (12 ounces) milk chocolate chips
3 tablespoons room temperature vegetable shortening, divided
1 bag (14 ounces) caramel candies, unwrapped
1 to 2 tablespoons water
1 bag (12 ounces) white chocolate chips
1 bag (6 ounces) walnut or pecan pieces, coarsely chopped
Wash and thoroughly dry apples. Using a pair of kitchen shears, remove stems. Insert popsicle sticks into each apple.
Over medium high heat, bring two inches of water to boil in a medium sauce pan. Once water has begun to boil, remove saucepan from burner. Cover pan with a heat-safe metal or glass bowl. Add chocolate chips and two tablespoons vegetable shortening. Stir until chocolate is melted. Carefully dip each apple into melted chocolate or drizzle mixture over apples using a spoon, until apple is completely coated. Place apples on a lined baking sheet and refrigerate until chocolate is firm, about 30 to 45 minutes.
In the meantime, prepare a saucepan for melting using instructions above. Add caramel candies and water, stirring until melted.
Remove cooled apples from refrigerator. Pat dry with a paper towel to remove any condensation. Using a spoon, drizzle warm caramel mixture over chocolate-coated apples. Return to baking sheet and refrigerate again for 30 to 45 minutes.
Prepare saucepan once again for melting using instructions above. Add white chocolate chips and remaining tablespoon of vegetable shortening. Remove cooled apples from refrigerator and pat with a paper towel to remove condensation. Drizzle white chocolate over caramel layer. Return apples to baking sheet. Allow to sit at room temperature for approximately five minutes until white chocolate layer is slightly cooled but still tacky. Roll apples in chopped nuts. Return to baking sheet and refrigerate for an additional 30 to 45 minutes.
Comments
Use the comment form below to begin a discussion about this content.
Sign in to comment
Or login with:
OpenID